How to setup Google calendar syncing for trainers V4
Step I - Set Up the Project
- Log into your GMail account.
- Go to the Google Developer Console by opening another browser tab and copy and paste the following URL into the address bar -https://console.cloud.google.com/projectselector2/apis/dashboard?pli=1&supportedpurview=project.
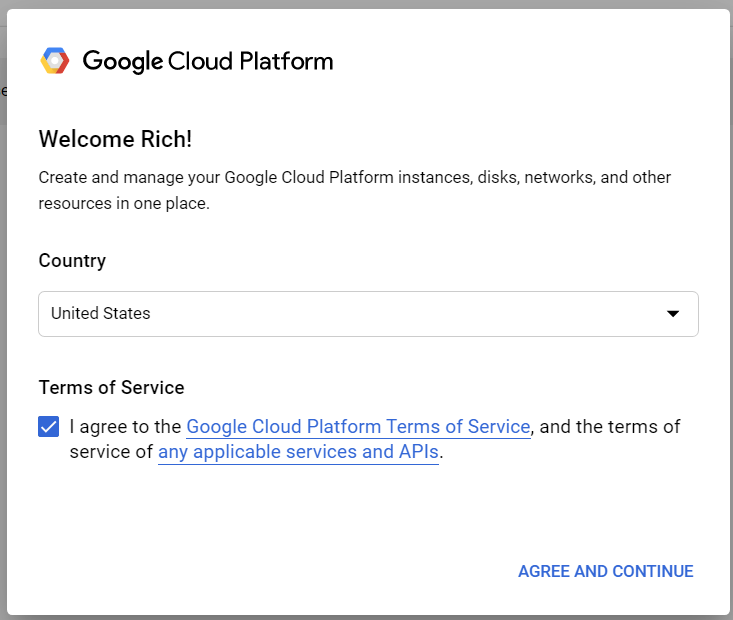
- When you see the screen below, click 'Agree and Continue'.
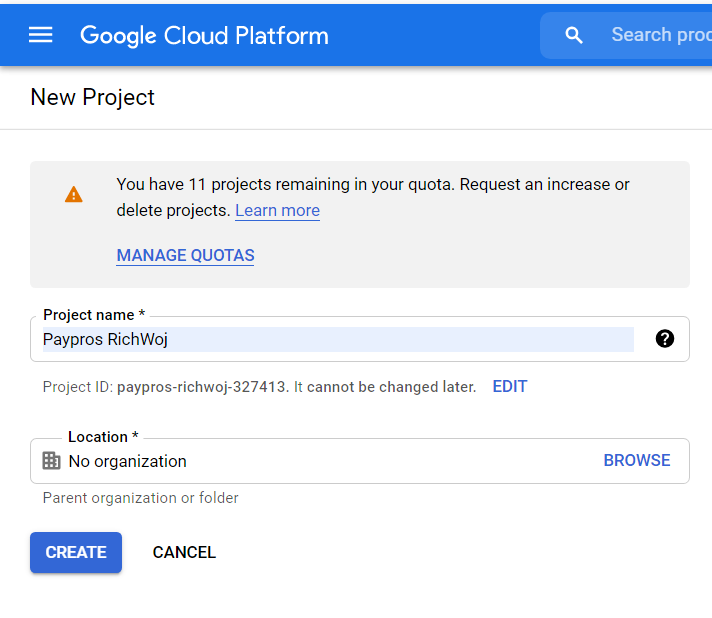
4. The next screen will be the Dashboard. Click 'Create Project'.

5. Enter a Project Name. The Project Name can be anything but should be something that is easily recognizable to you. Click 'Create'.
Step II - Enable the Google Calendar API
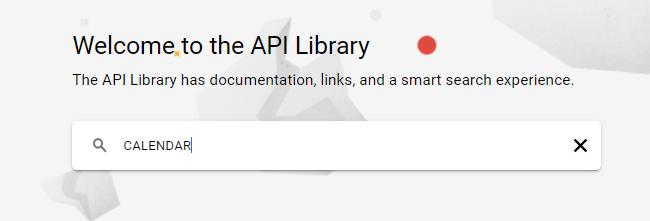
- Click "Enable APIS AND SERVICES" -> Enter Calendar into the search field

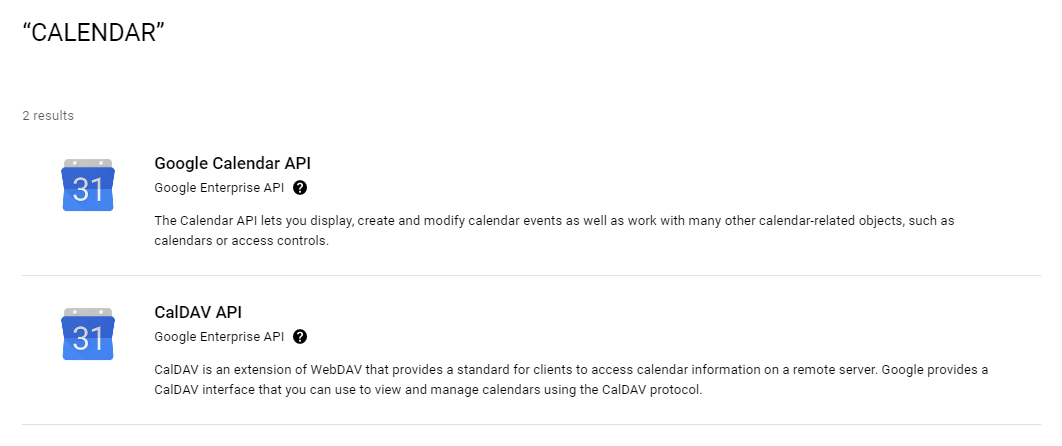
2. When results appear select "Google Calendar API.
3. Click "ENABLE" if not already enabled
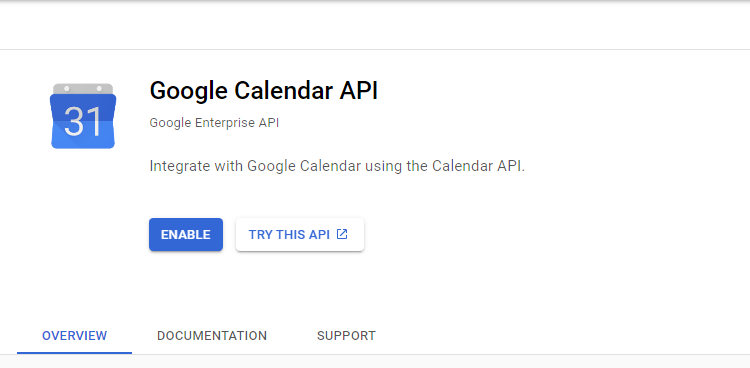
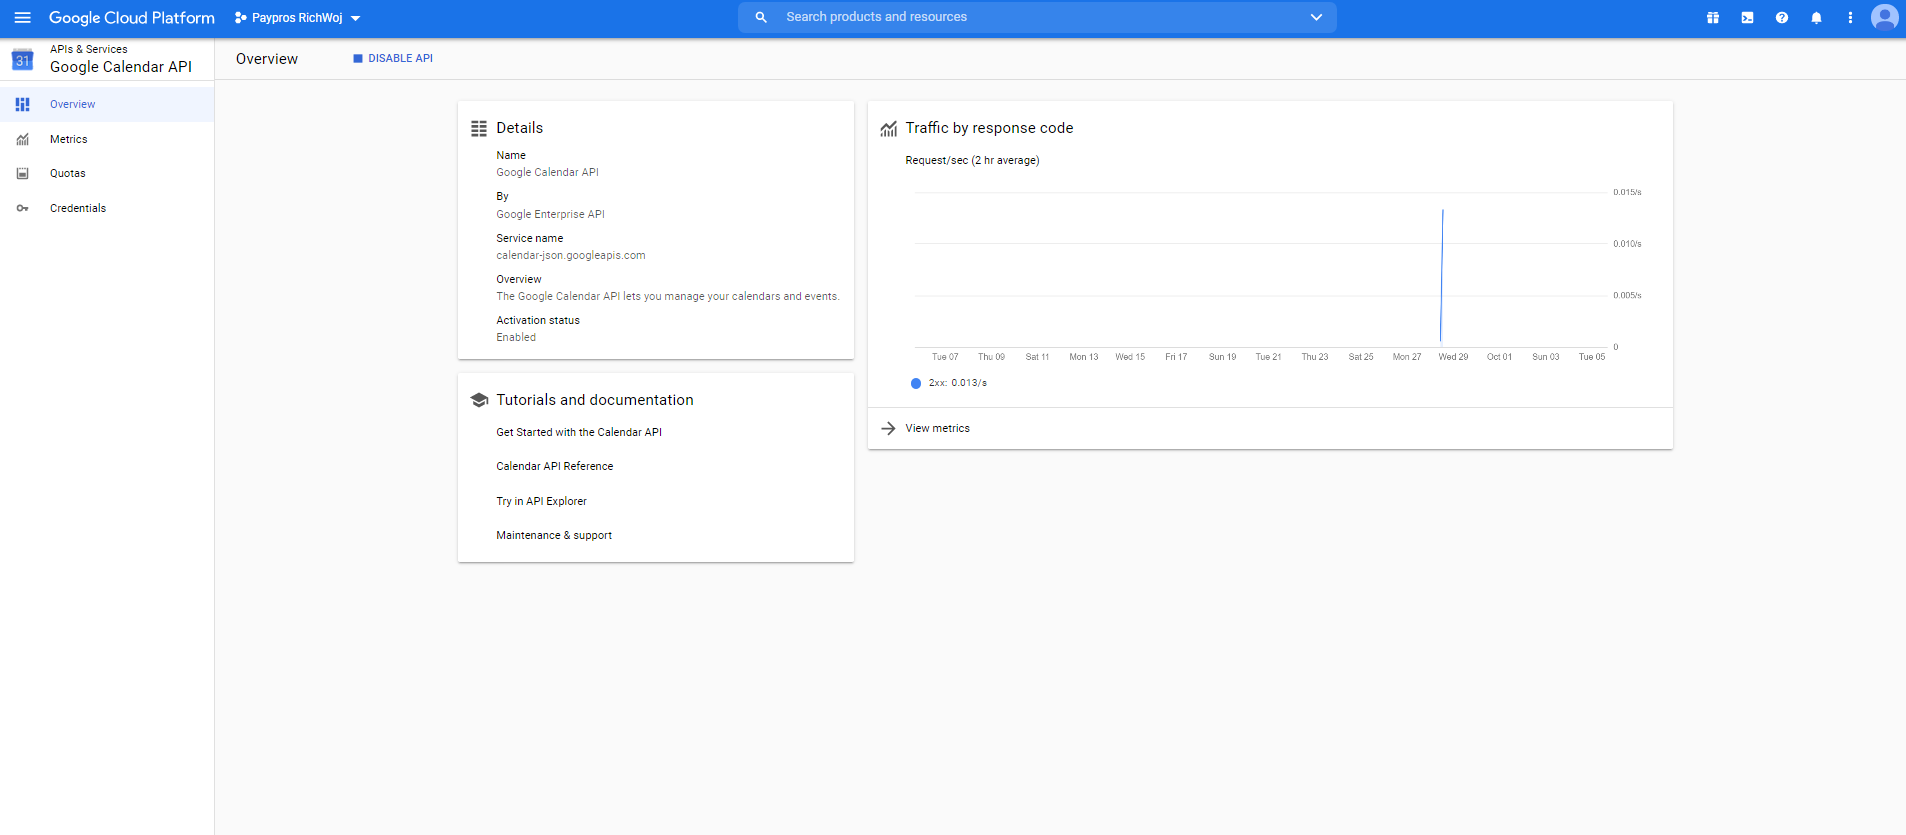
4. The next Dashboard will be the Google Calendar API. Click 'Create Credentials' on the far right of the screen.

Create Credentials
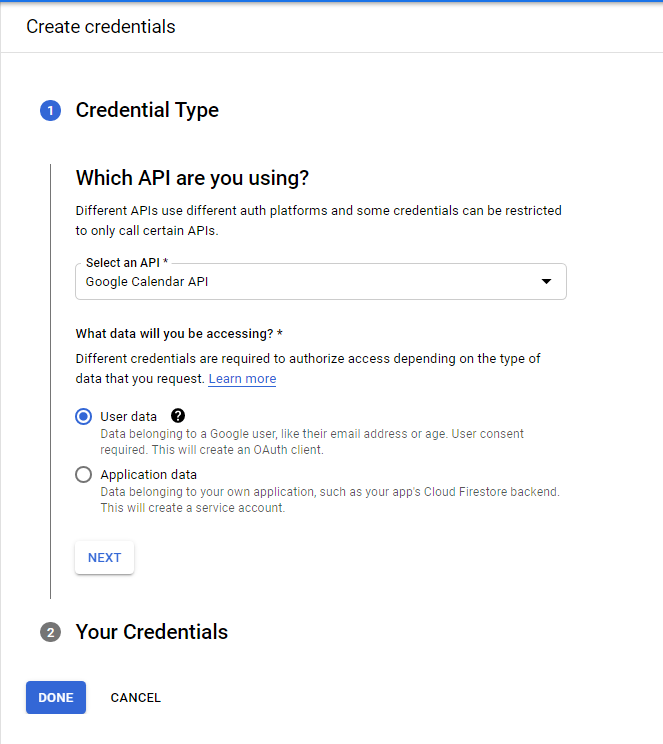
- Credential Type - Select Google Calendar API from the drop down.
- Click the radial for User Data
- Then click 'Next'.
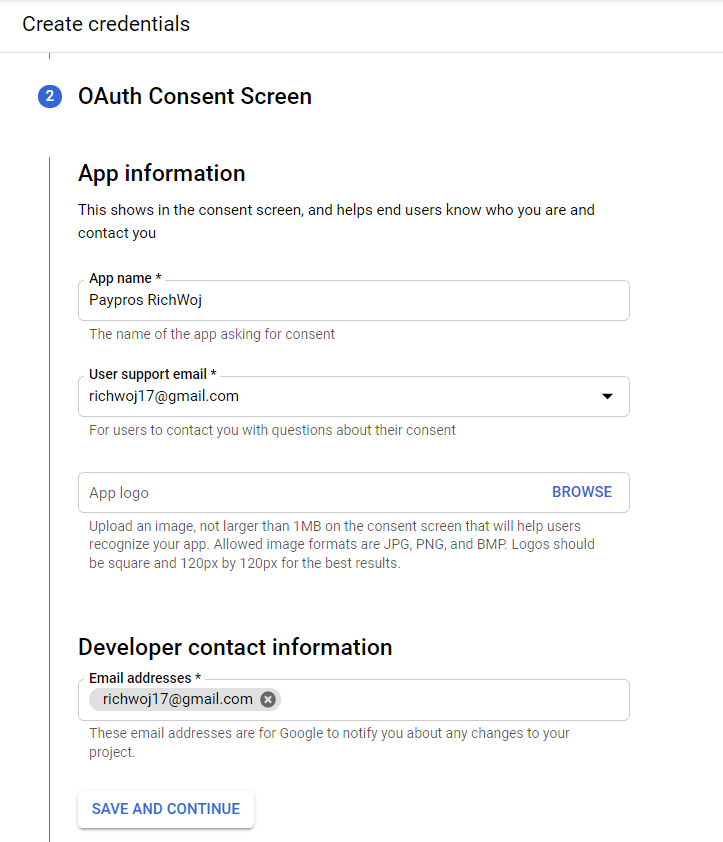
OAuth Consent screen
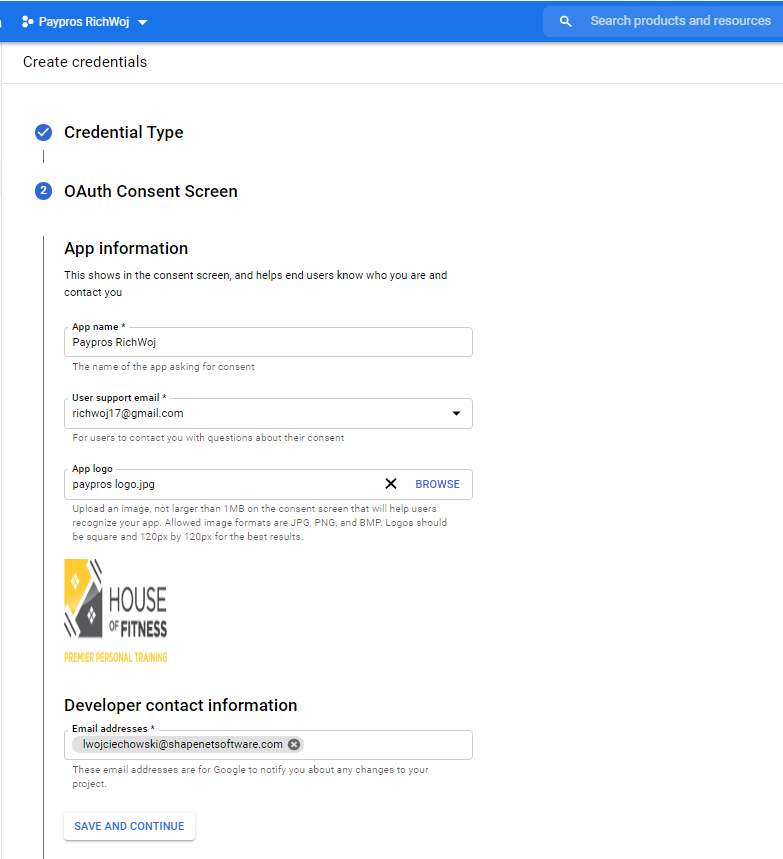
- Under App information, enter the app name. This should be the Project name.
- User Support Email. Enter the client's email address or the main Trainer's email address.
- Developer Contact Information. Enter the same email address as the Support Email address.
- Click 'Save and Continue'.
Scopes (not required. Skip this section).
- Scroll down and click 'Save and Continue'.
OAuth Client ID
- Select 'Web application' from the Application Type drop down.
- This action will auto-populate the Name field with 'Web Client 1'.
Authorized Javascript
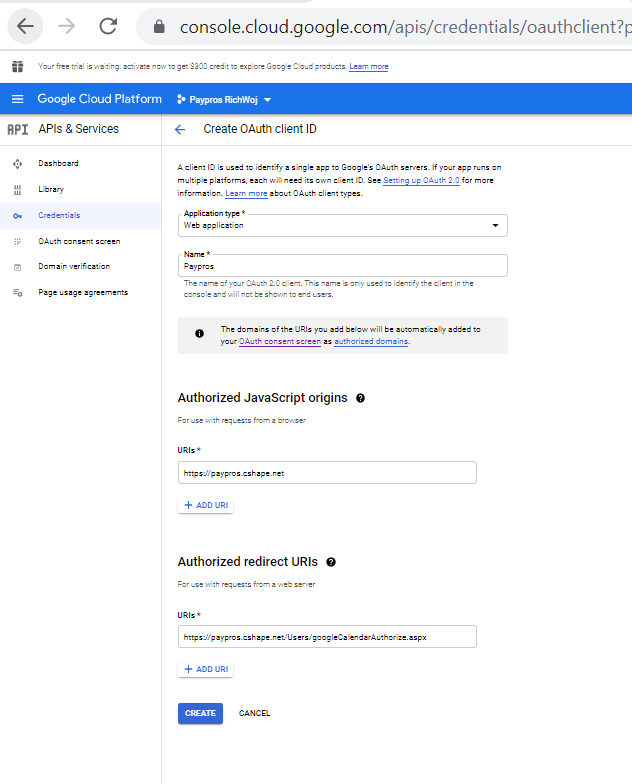
- Add URI = Shape system URL (https://xxxx.cshape.net).
- Add Redirect URI = Shape system URL + /users/googleCalendarAuthorize.aspx (https://xxxx.cshape.net/users/googleCalendarAuthorize.aspx).
- Click 'Create'.
- Download Credentials
- A pop-up screen with your Client ID and Your Client Secret will appear. Make a note of these as this information will need to be entered on the trainer detail record in the ShapeNet software.
- Done.
If any of the above steps appear different or out of order see additional steps below.
________________________________________________________________________________________________________________
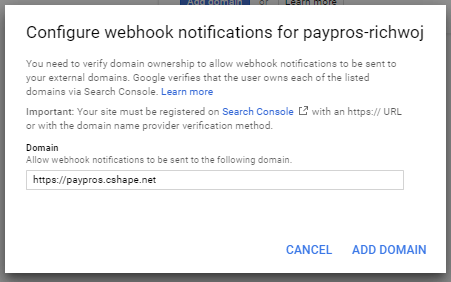
- Click Domain Verification on left menu-> Enter Domain Information
- A verify ownership screen will appear click "TAKE ME THERE"
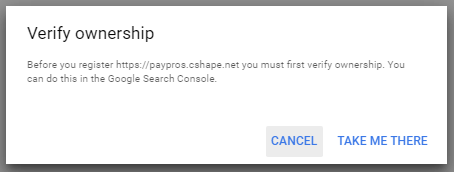
- This step will require ShapeNet to be involved. You should have already contacted Support in the beginning of this process.
- Click "ADD A PROPERTY" -> Enter URL for your system and Click "CONTINUE"
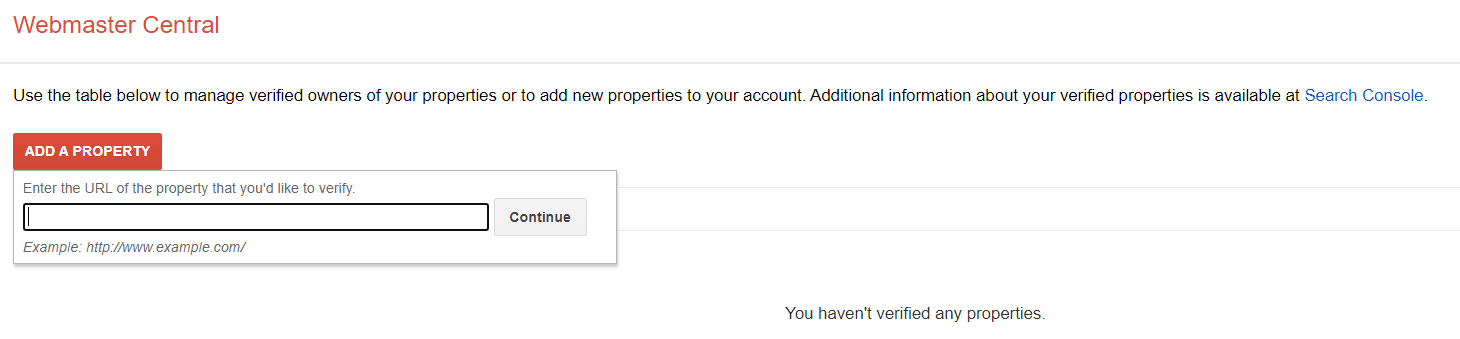
- After you click 'Continue' to add the property, the WEBMASTER CENTRAL page will open in a new tab.
- Click Download this HTML verification LINK and this will need to be emailed to the ShapeNet team to put in the WWWROOT folder of your system.
- The HTML verification is a single line that looks like this - google-site-verification: google249ccb2e2ae59c38.html.
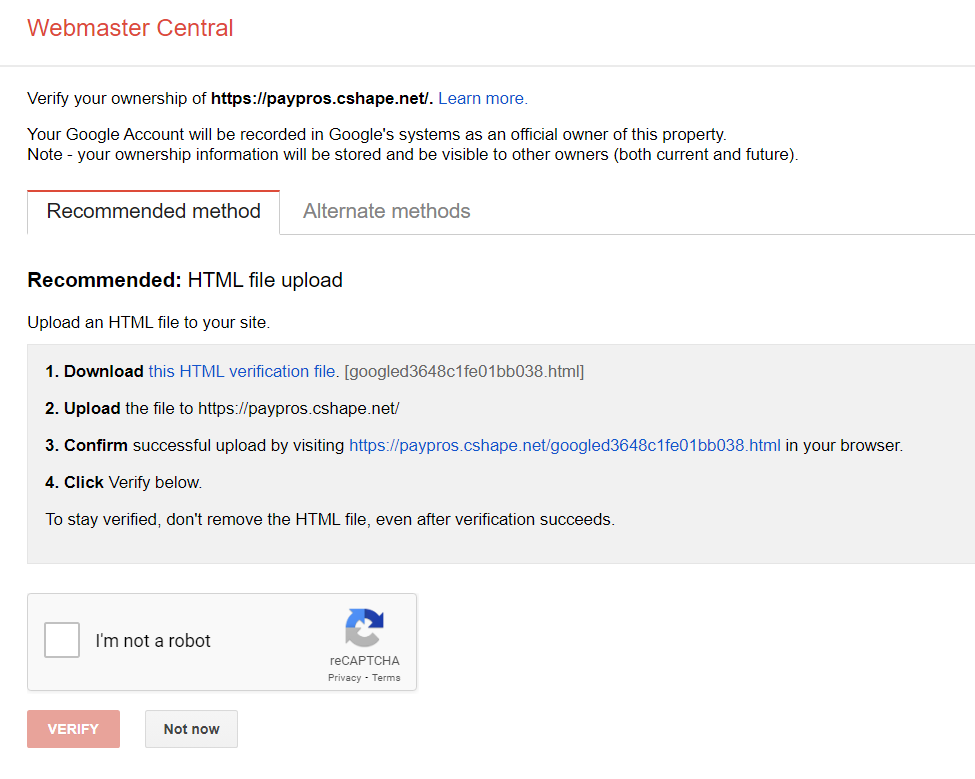
- Once the file is in place by the ShapeNet Team check "I'm not a robot" and click "VERIFY"
- If you were validated successfully a similar screen will appear.
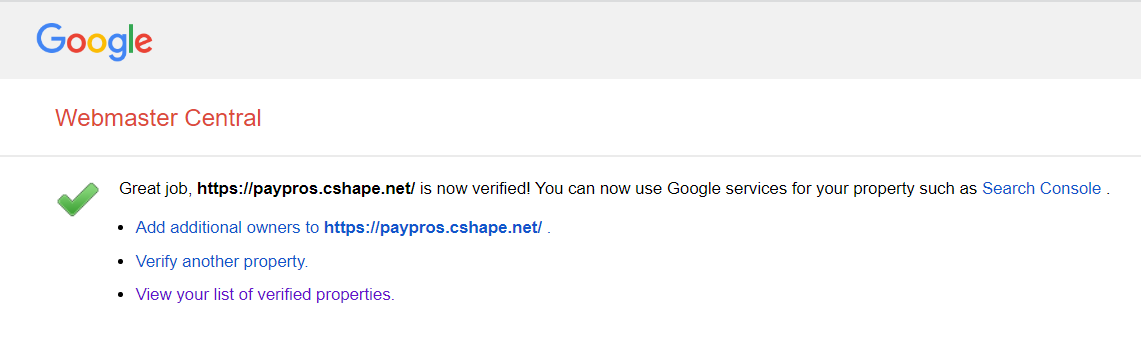
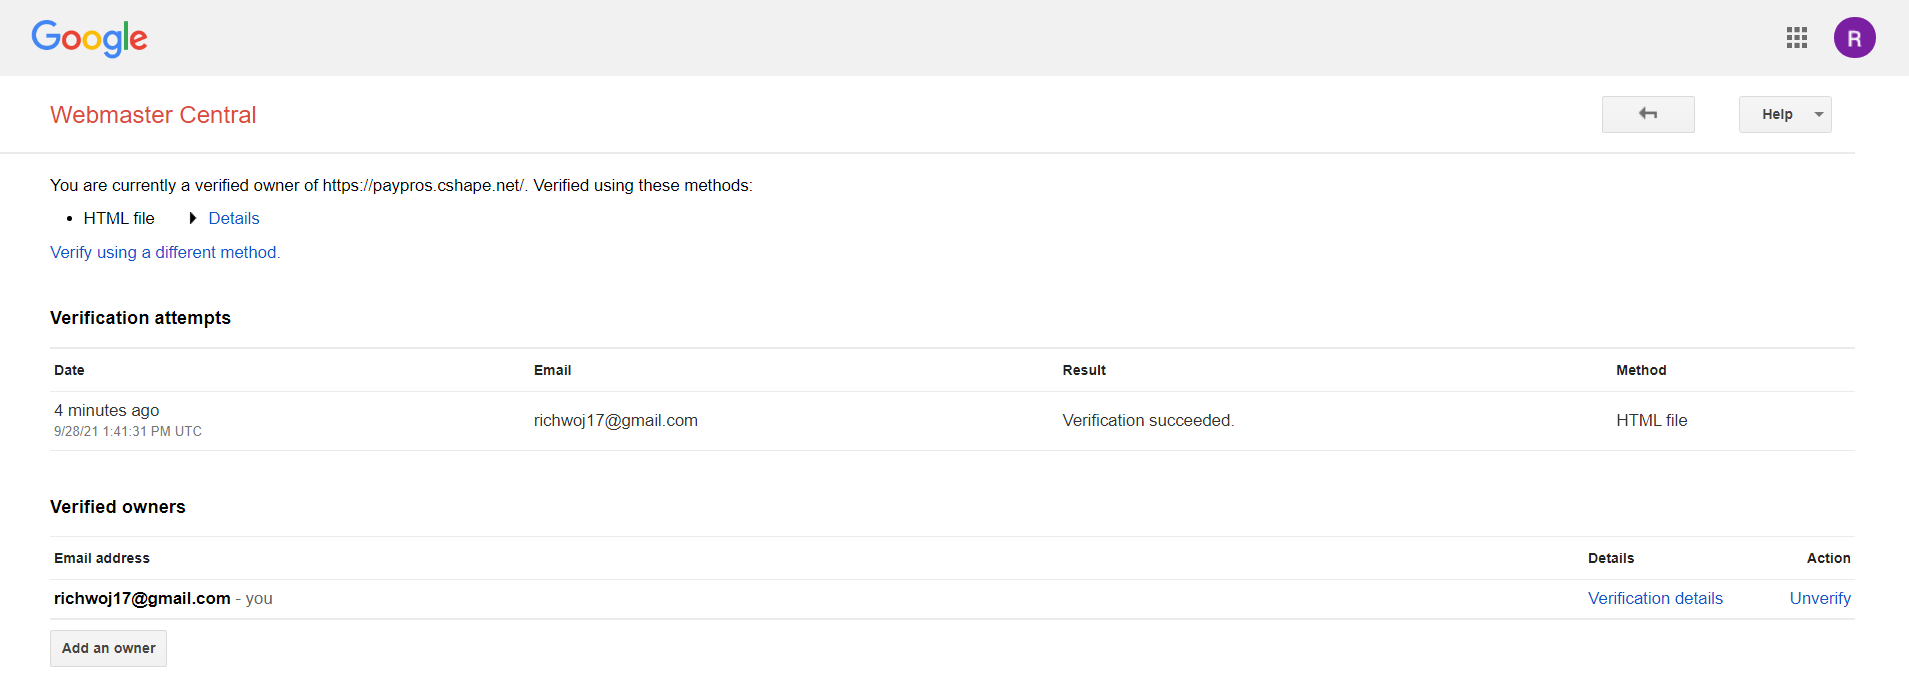
- Click "View your list of verified properties." This will display the URL for your system and allow you to view Verification Details if needed

- Click Verification Details will display the following screen
- Select Google Calendar API -> select User data -> Click "NEXT"
- Enter credential Information then click "SAVE AND CONTINUE"
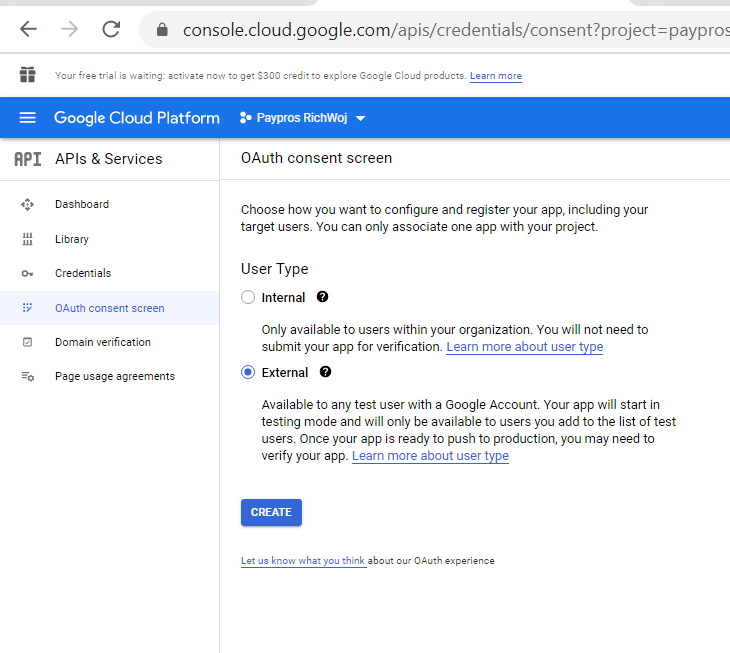
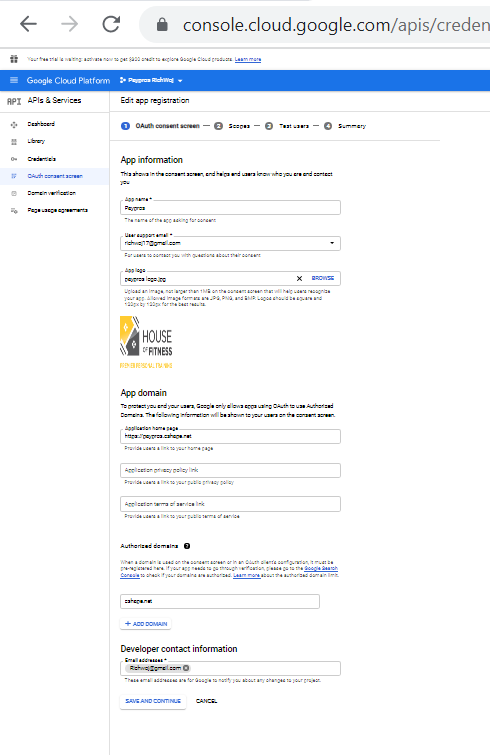
- On the left menu select OAuth consent screen -> select External -> Click "CREATE"
- Fill in information Application home page-> Enter User support email -> Enter Application Home Page: -> Click Add Domain cshape.net - Click "ADD DOMAIN" -> Enter Developer contact information -> Click "SAVE AND CONTINUE"
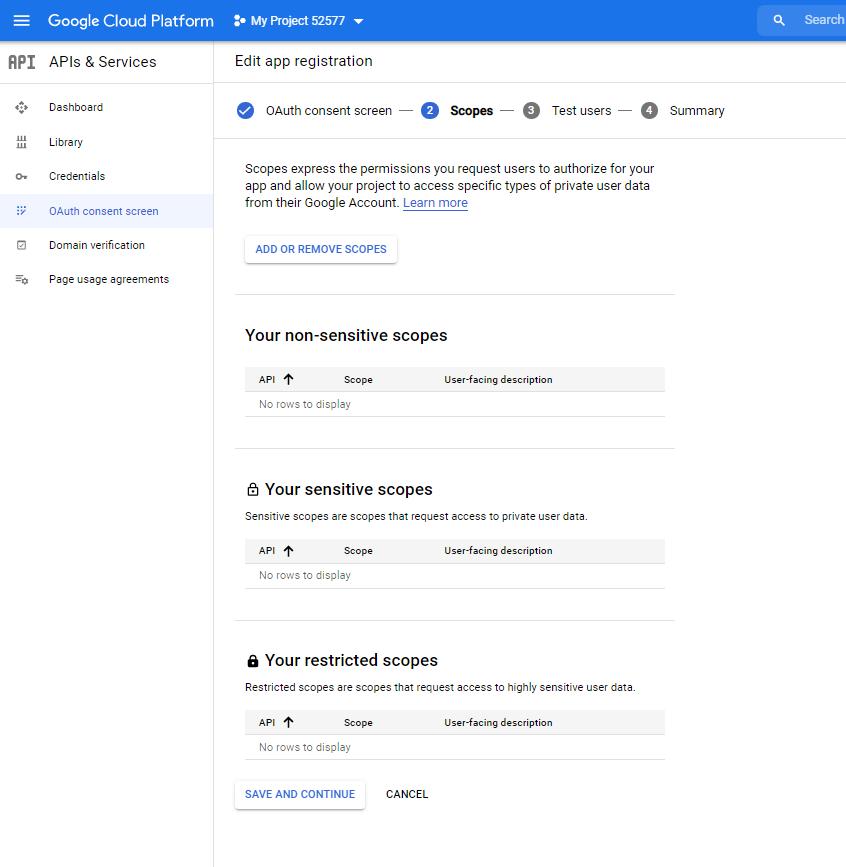
- Skip Scopes and click "SAVE AND CONTINUE"
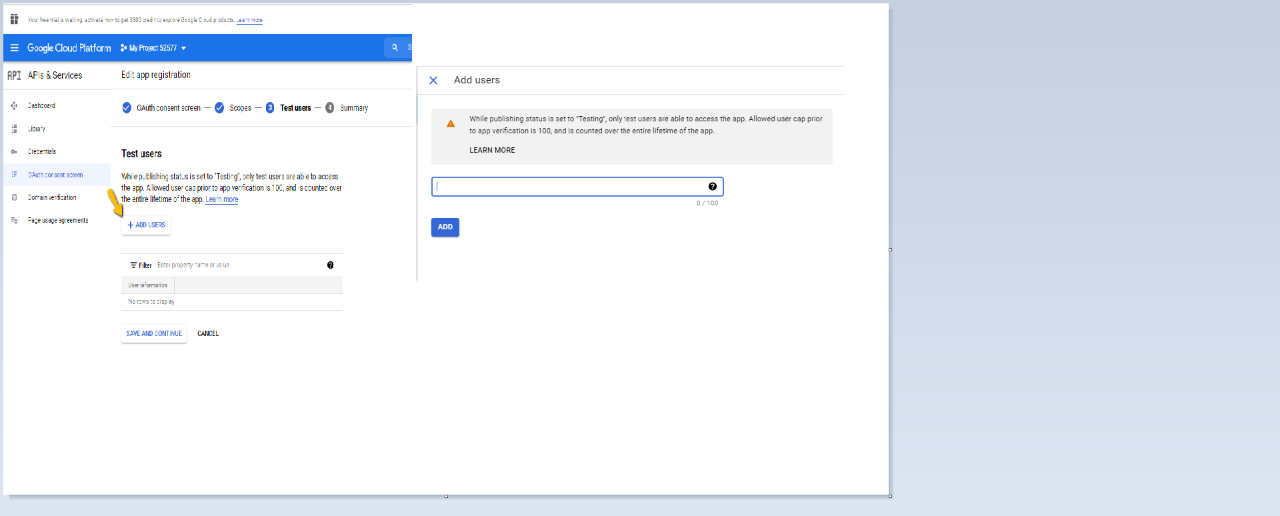
- Click "+ ADD USERS" -> Enter trainer email-> click "ADD" -> Click "SAVE AND CONTINUE" -> Click "BACK TO DASHBOARD" -> Click "PUBLISH APP"
- On the Left Menu click Credentials -> Click Create Credentials -> Select "Oauth client id"
- A screen with your Client ID and Your Client Secret, make a note of these as this information will need to be entered on the trainer record in the ShapeNet software.
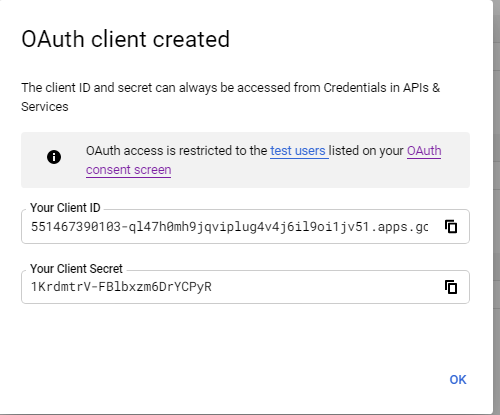
- Trainer provides his/her Google Client id and client secret to an Admin at the gym.
- Quick Functions -> User -> Quick Menu/Trainers/search Trainer Name to edit a trainer.
- Under Miscellaneous section, fill in this trainer’s Google Calendar Email Address and "SAVE THE TRAINER RECORD".
- "EDIT" the trainer record and fill in the Google Client Id and Google Client Secret.
- Click Authenticate to continue to Consent Screen, Accept the terms and enable Google Calendar service for this trainer.

- If the Authentication worked a screen to login to the google account will appear.
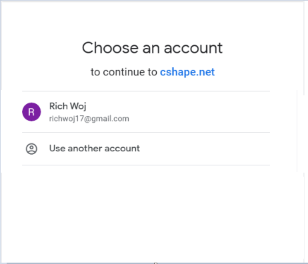
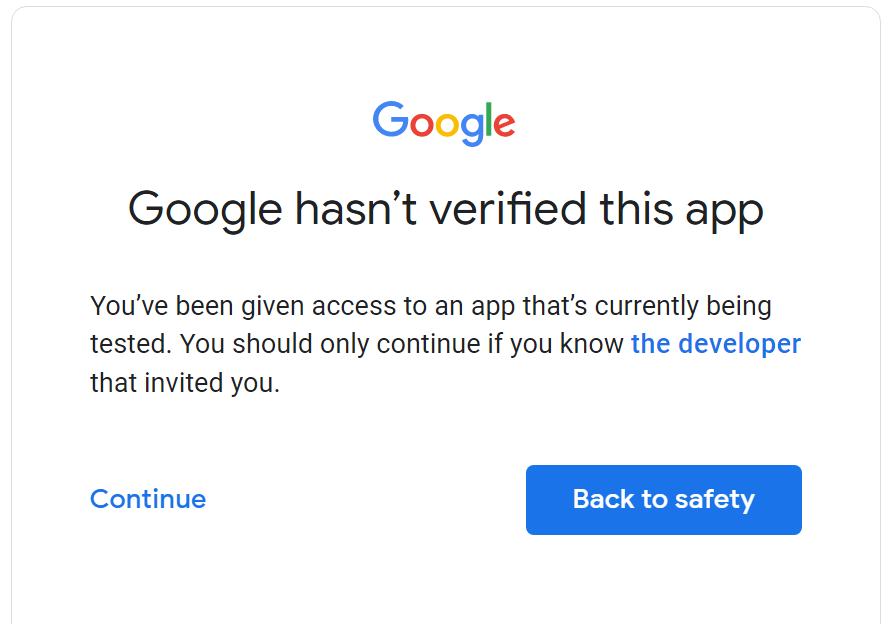
- Have the trainer Login to his/her Google calendar email and click "CONTINUE"
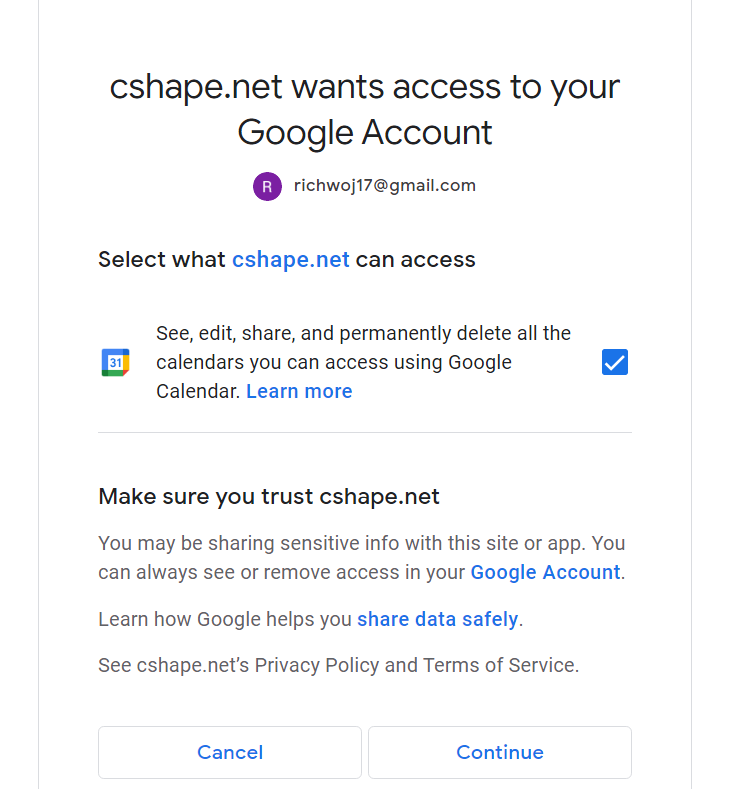
- Give cshape.net access to the trainer's google account by checking the box and click "CONTINUE"
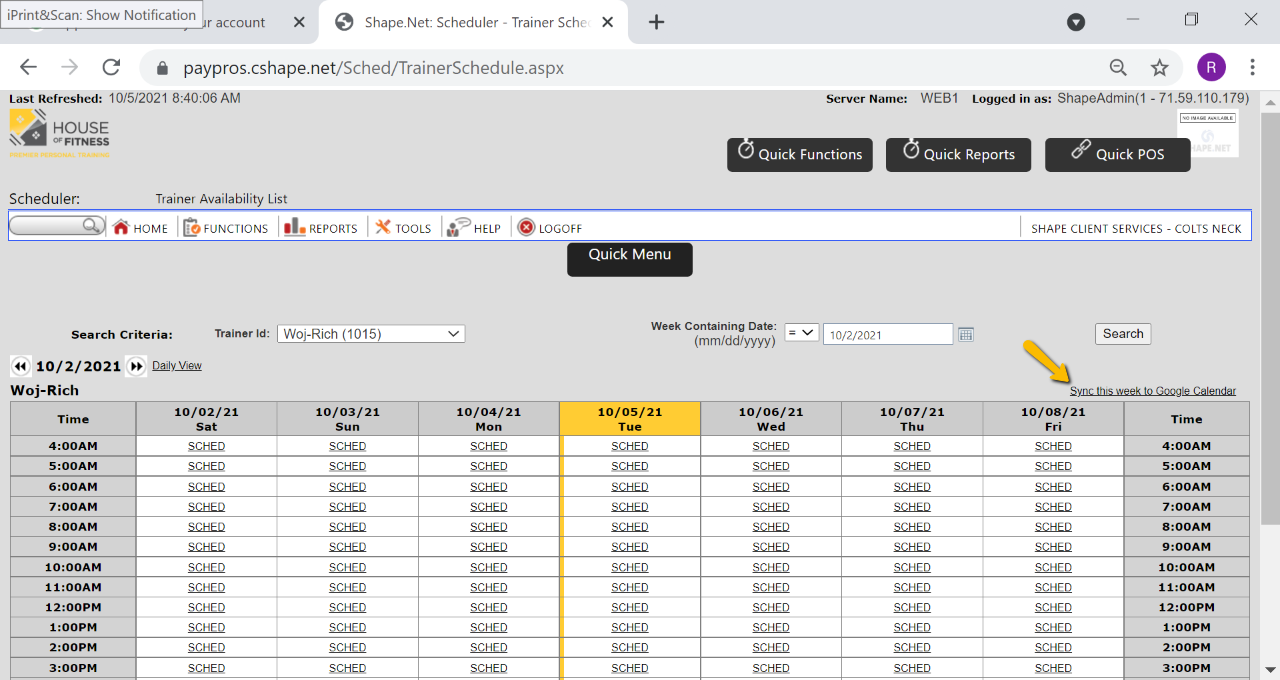
- Go to Quick Functions->Sched Matrix->Quick Menu->Trainer Schedule->look up trainer id->Search -> on top right corner click sync this week to Google Calendar.
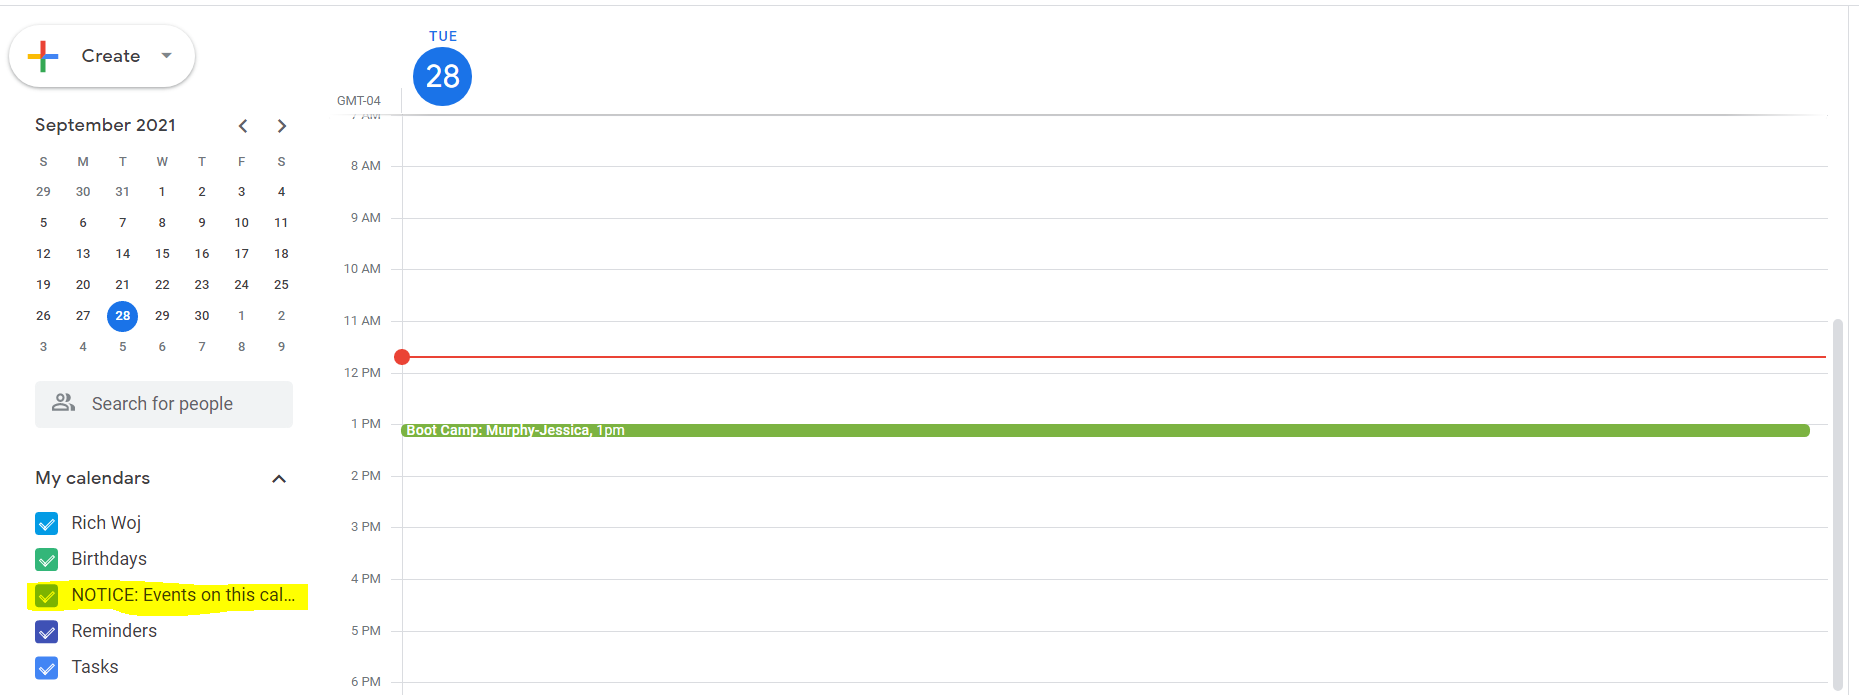
- Have the Trainer login to their Google Calendar email and check the NOTICE: Events to display the appointments that were synced from the ShapeNet System if not already checked.
Removing permissions for the google sync
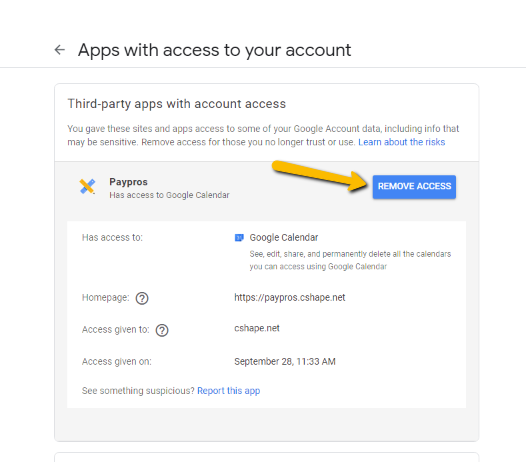
- If a trainer no longer wants to view the ShapeNet calendar on his/her google email account -> click Google Account -> Then click Manage your Google Account -> Click Security on left menu -> Click Manage third-party access ->Paypros -> Ability to remove access will appear and then click "REMOVE ACCESS".
Trouble shooting
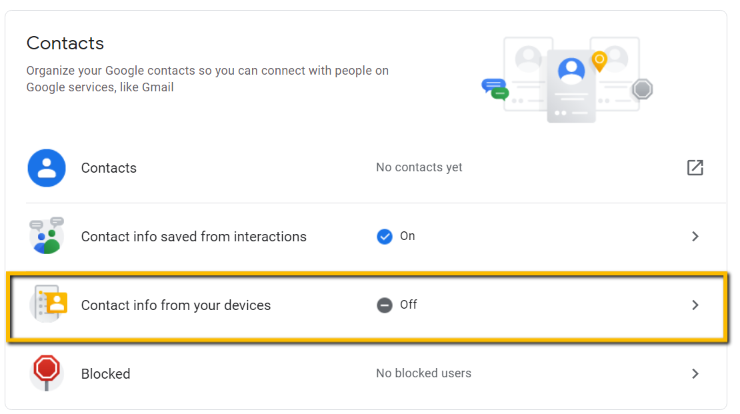
- If you aren't seeing your google calendar sync option in Shape after completing all the above steps, open your google email account Manage accounts -> people and sharing -> Make sure "Contact info from your devices" is off "
Comments
0 comments
Article is closed for comments.